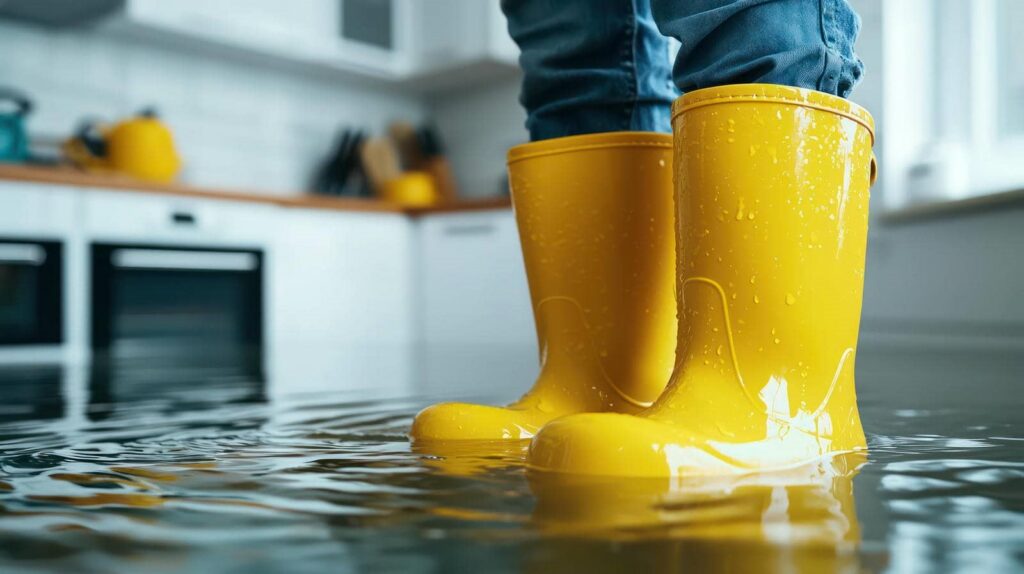
You might not realize that mold can begin to grow within just 24 to 48 hours after a flood. Understanding the specific conditions that promote this growth is vital for effective remediation. A systematic approach, including thorough assessments and targeted techniques, can make all the difference. But, knowing when to tackle mold yourself versus calling in professionals can be unclear. Let’s explore the essential steps you need to take for effective mold remediation.
Key Takeaways
Conduct a thorough visual inspection and moisture assessment of affected areas within 24 to 48 hours post-flood to identify mold risks.
Utilize HEPA vacuums and antimicrobial solutions to effectively remove mold spores and improve indoor air quality during remediation.
Maintain relative humidity below 60% using dehumidifiers and proper ventilation to inhibit mold growth in water-damaged spaces.
Seek professional help for extensive mold growth or when health risks are present, especially in hard-to-reach areas.
Regularly monitor indoor humidity levels and educate household members on recognizing mold symptoms for proactive prevention.
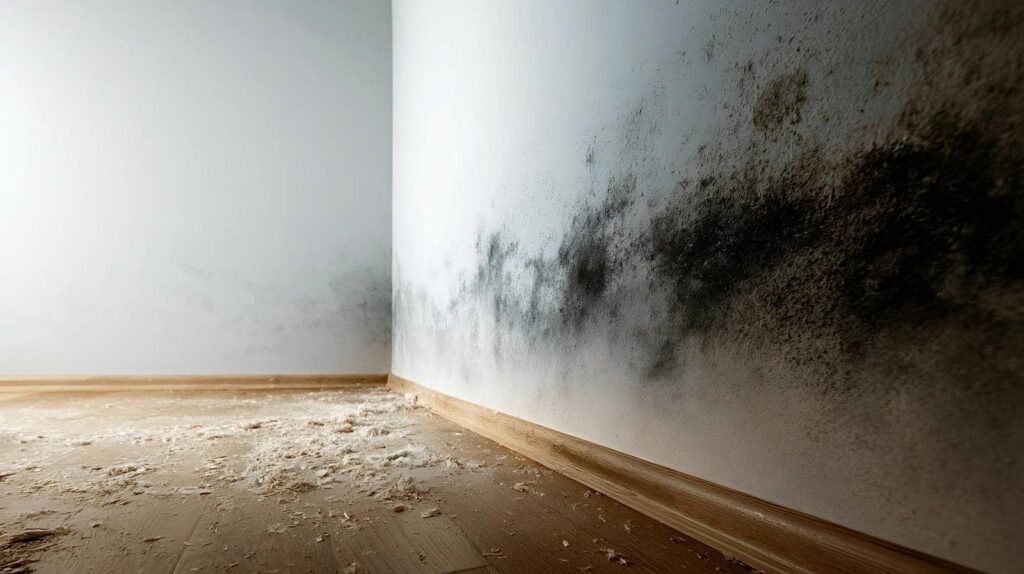
Why Mold Grows After Flooding: Understanding the Risks
When a flood occurs, it creates an ideal environment for mold to thrive, as moisture and organic materials become abundant.
Mold growth causes are primarily linked to excess water, which saturates building materials like wood and drywall. Flood damage effects include structural deterioration and the rapid proliferation of mold spores.
These spores can settle and begin to grow within 24 to 48 hours, posing health risks to you and your loved ones. As the material decomposes, it fosters a breeding ground for various mold types, further complicating cleanup efforts.
Understanding these dynamics is essential; by recognizing the risks associated with mold after flooding, you’re better equipped to take proactive measures in safeguarding your home and health.
Essential Steps for Initial Mold Assessment
When evaluating for mold after a flood, start with a thorough visual inspection of the affected areas.
Next, measure moisture levels to identify hidden issues, as high humidity can foster mold growth.
Finally, pinpoint the materials impacted, as this will guide your remediation strategy effectively.
Visual Inspection Techniques
Although mold growth can start within 24 to 48 hours after a flood, conducting a thorough visual inspection is crucial for an effective initial assessment.
Begin by checking visible areas, including walls, ceilings, and floors, for signs of mold. Use thermal imaging to identify temperature variations that may indicate hidden moisture, a breeding ground for mold.
Pay special attention to areas around windows, pipes, and where water may have pooled. For a more accurate evaluation, surface sampling can be conducted to confirm mold presence and type.
This combination of techniques ensures you capture both visible and hidden mold issues, laying a strong foundation for subsequent remediation efforts. Your diligence now can help create a safer environment for everyone.
Moisture Level Assessment
Following a thorough visual inspection, evaluating moisture levels is the next essential step in mold assessment. Start by using moisture detection tools like hygrometers and moisture meters to gauge the humidity in affected areas. Aim for a relative humidity below 60% to inhibit mold growth.
If you find elevated moisture, take immediate action to implement humidity control measures, such as dehumidifiers and proper ventilation. Address hidden areas, like behind walls or beneath flooring, where moisture can linger undetected.
Regularly monitor these levels to ensure they remain stable. By actively managing moisture and controlling humidity, you create an environment that discourages mold proliferation, helping you protect your space and foster a healthier living environment for everyone involved.
Affected Material Identification
Identifying affected materials is essential in the initial mold assessment process. Start by examining various material types in the flooded area, such as drywall, carpets, and wood. Each type has unique vulnerabilities to mold growth.
Use identification methods like visual inspection and moisture meters to pinpoint areas at risk. Don’t just rely on what you see; check behind surfaces and within walls where moisture might linger unseen.
Keep track of which materials show signs of mold or damage, as this will guide your remediation efforts. By understanding the specific materials affected, you can develop a more effective strategy for mold removal, ensuring a safer environment for everyone involved in the recovery process.
Choose Effective Mold Remediation Techniques for Homeowners
When choosing mold remediation techniques, first identify the types of mold present in your home, as different species require different approaches.
You’ll also need essential tools like HEPA vacuums and moisture meters to effectively tackle the problem.
Understanding these factors ensures a targeted and efficient remediation process.
Identify Mold Types
Mold can be a homeowner’s worst nightmare, especially after flooding. Identifying mold species is essential because different types pose varying health risks.
Common molds like Stachybotrys (black mold) can lead to serious respiratory issues, while Aspergillus may trigger allergies.
You’ll want to recognize signs of mold growth, such as musty odors or discolored patches on walls. Use a flashlight to inspect damp areas, particularly basements and attics.
Maintaining a dry environment is key to preventing mold proliferation, so monitor humidity levels.
When you understand the mold types present in your home, you can implement targeted remediation strategies, ensuring a healthier living space for you and your family.
Don’t underestimate the importance of mold identification in your recovery efforts.
Essential Remediation Tools
To effectively tackle mold remediation after flooding, having the right tools at your disposal is essential.
Start with quality remediation equipment, including a HEPA vacuum to capture mold spores and an air scrubber to improve indoor air quality. You’ll also need moisture meters to assess damp areas and dehumidifiers to eliminate excess humidity, which can foster mold growth.
Don’t forget your safety gear; wearing gloves, masks, and goggles protects you from harmful spores and chemicals.
Additionally, consider using antimicrobial solutions for effective mold removal.
By equipping yourself with these essential tools, you safeguard your health and create a safer, mold-free environment for your family.
Best Mold Remediation Products
While addressing mold issues after a flood, choosing the right remediation products is essential for effective results.
Start with reliable mold removal products that specifically target spores. Anti-fungal sprays are important for immediate application, while surface treatments can help prevent future growth. Use mold inhibitors in your cleaning agents to enhance their effectiveness.
HEPA filters are critical for air purification, capturing airborne spores and ensuring a safer environment. Don’t forget protective gear; it’s necessary to shield yourself during the process.
For persistent mold problems, encapsulation solutions can seal surfaces and inhibit growth. By selecting the right combination of these products, you’ll foster a healthier space and promote a sense of belonging in your home.
When Should You Call in the Pros for Mold Remediation?
When should you consider bringing in professionals for mold remediation? If you suspect mold growth affecting your home’s air quality, it’s time to call in the experts.
Mold health issues can escalate quickly, leading to respiratory problems or allergic reactions. If you notice extensive mold growth—over 10 square feet—or it’s in hard-to-reach areas, like behind walls or under floors, don’t hesitate.
Safety concerns also matter; if you’ve experienced severe water damage, professionals have the right equipment and expertise to handle the situation safely.
Ultimately, when mold poses a risk to your family’s well-being or exceeds your comfort level to manage, seeking professional help is a wise decision to ensure a thorough and effective remediation process.
How to Prevent Mold From Returning
Preventing mold from returning requires a proactive approach to moisture control and environmental management. Start by implementing preventative measures like sealing cracks, ensuring proper drainage, and using dehumidifiers in damp areas.
Regularly inspect your home for leaks and address them immediately to minimize moisture accumulation.
Consider investing in moisture-resistant materials for future renovations, as these can serve as long-term solutions.
Maintain good ventilation by using exhaust fans in bathrooms and kitchens, which helps reduce humidity.
Additionally, monitor indoor humidity levels; aim for a range of 30-60%.
Signs You Need Immediate Mold Remediation?
Recognizing the signs that you need immediate mold remediation can be essential for your health and home. If you notice persistent mold symptoms like coughing, sneezing, or skin irritation, it’s time to act.
These health effects aren’t just uncomfortable; they can lead to more serious respiratory issues if left untreated. Additionally, if you see visible mold growth or smell a musty odor, don’t ignore it.
Check areas prone to moisture, such as basements or bathrooms. Water damage from a flood can escalate mold problems quickly.
Trust your instincts—if something feels off in your environment, it’s better to be proactive. Addressing mold issues promptly helps ensure a healthier living space for you and your loved ones.
Frequently Asked Questions
How Long Does Mold Remediation Typically Take?
Mold remediation typically takes one to two weeks, depending on the flood impact and the extent of contamination. You’ll want to ensure thoroughness during this remediation duration to effectively eliminate mold and prevent future growth.
Can I Do Mold Remediation Myself?
Yes, you can tackle mold remediation yourself using DIY methods, but you must prioritize safety precautions. Always wear protective gear, ventilate the area, and ensure thorough cleaning to prevent future growth and protect your home’s safety.
What Health Risks Are Associated With Mold Exposure?
Exposure to mold can lead to significant health risks, like respiratory issues. For instance, a study showed that individuals with asthma faced worsened symptoms after mold exposure. Understanding these mold health effects is essential for your well-being.
Will Mold Return After Remediation?
Yes, mold can return after remediation if moisture control strategies aren’t implemented. By addressing mold regrowth factors like humidity levels and leaks, you can greatly reduce the chances of mold reappearing in your space.
How Can I Tell if Mold Is Removed Completely?
To ensure mold is completely removed, conduct thorough visual inspections and perform mold testing. Look for lingering signs or odors, and check moisture levels. If everything’s clear, you can feel confident your space is mold-free.
Conclusion
Tackling troublesome mold after a flood demands diligence and decisive action. By detecting dampness, deploying effective products, and diving into preventative measures, you can safeguard your space. Remember, timely treatment is the key to thwarting future threats. Don’t delay—decide to defend your home and health today. With the right strategies, you can create a mold-free haven that promotes peace and well-being for you and your loved ones.